Azure Cosmos DB is a fully managed NoSQL database for modern app development. Data in this database are available using APIs. To find out how to get Azure Cosmos DB, licensing and all other details see Microsoft portal https://docs.microsoft.com/en-us/azure/cosmos-db/introduction.
——————————————————————————————————————
This is the first part of series of three articles about integration between Microsoft Azure Cosmos DB and Microsoft Dynamics 365 Business Central. This part explains how to create Azure Cosmos DB environment (Database, Container), how to add new values to your newly created database and how to obtain your API keys that will be used later for API authorization.
The second part explains how to connect to Cosmos DB using AL Language and how to get values from your database using GET requests. The third and last part describes how to send your own SQL queries using POST request from AL Language to get filtered results based on variable requests made in AL Language.
——————————————————————————————————————
Create database & container
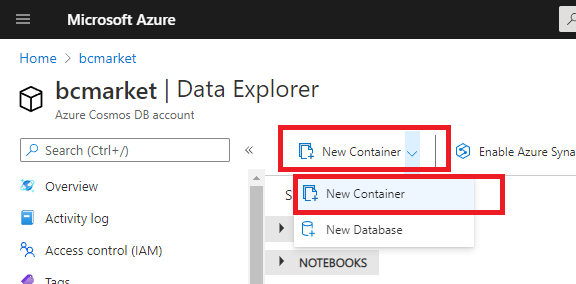
The environment for Azure Cosmos DB can be created directly at Azure portal (https://portal.azure.com/). Once the environment is created, you should be able to create a new database (see image below) using ation “New Database”.
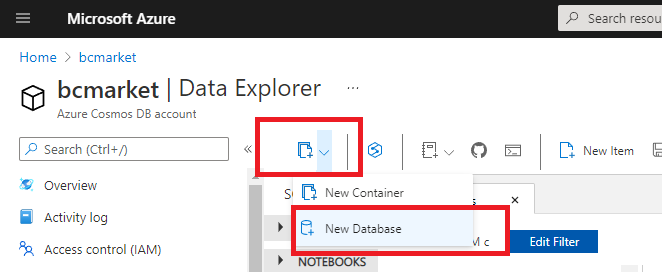
Now you can specify name of your new database. It is important to remember that Database id is always case-sensitive! You do not have to change anything else (other fields can be used for performance & pricing optimalization but are not linked directly to the topic of this series).
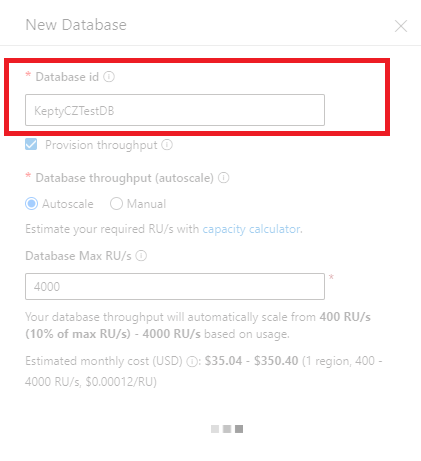
In the “standard” database (SQL-based like MSSQL) the database has set of tables that contains fields and store values. In Cosmos DB our database “store” containers. It is not called table as it stores comples objects (JSON) that can vary in the structure and even can store “tables in tables” (complex JSON) object.
So have already created Database, new we have create at least one Container.
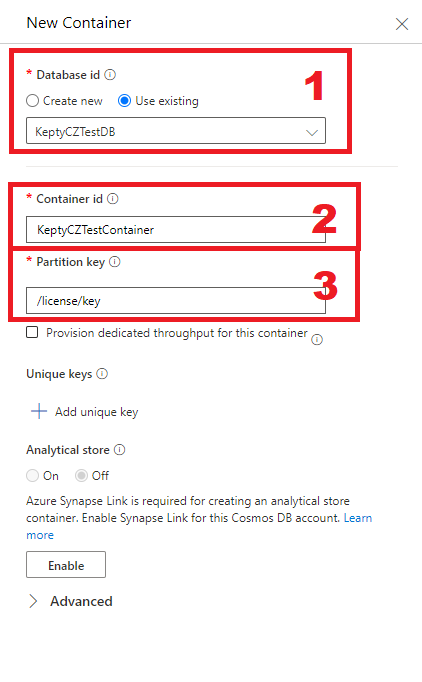
You can create container in new database or create it in already existing one. As we created database manually in the previous step, choose “Use existing” and select your created database. Specify “Container id” (unique, again it is important to remember the value is case-sensitive).
You have to also specify “Partition key”. This key should be the field that has many different values accross your data and also the field should be used for accesing to the specific record. If you don’t know what to put there, set /id (read the help tooltip for more info). Other fields can be skipped (but you can specify for example unique keys, if you need based on your business requirements).
Now you have both database and container. Go to the “Data explorer” -> “Data” -> Select your database -> Select your container -> Select “Items”.
To define structure (or data, in Cosmos DB these two things are interchangeable) go to “New Item” and put your data in JSON object structure to the text editor. Once you have everyhing defined, save it. See the picture below.
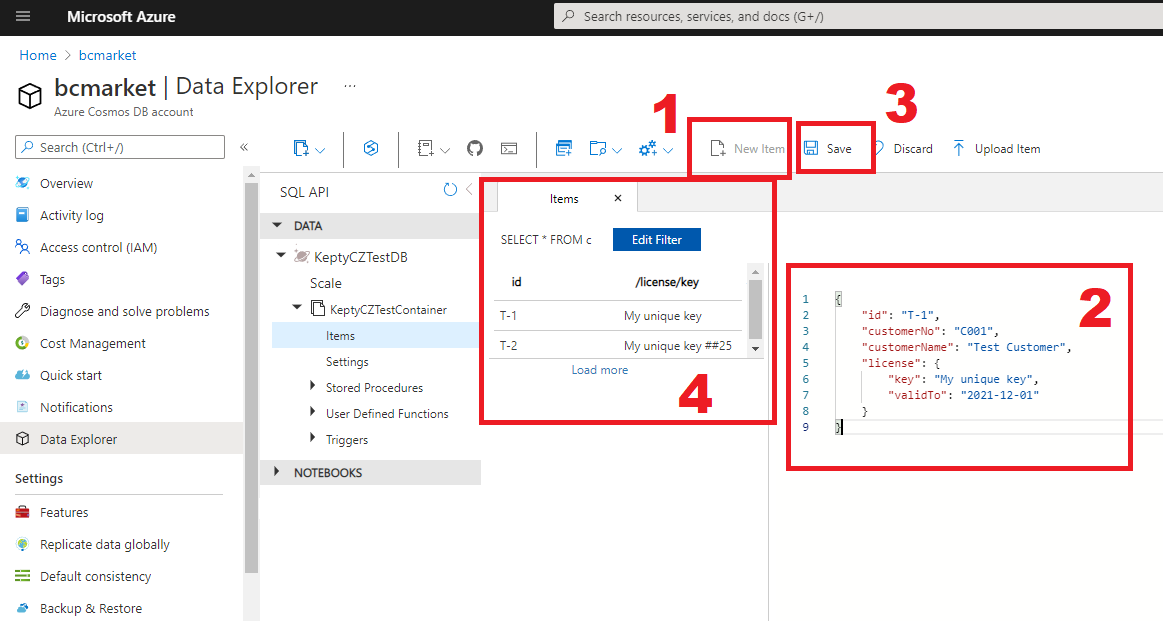
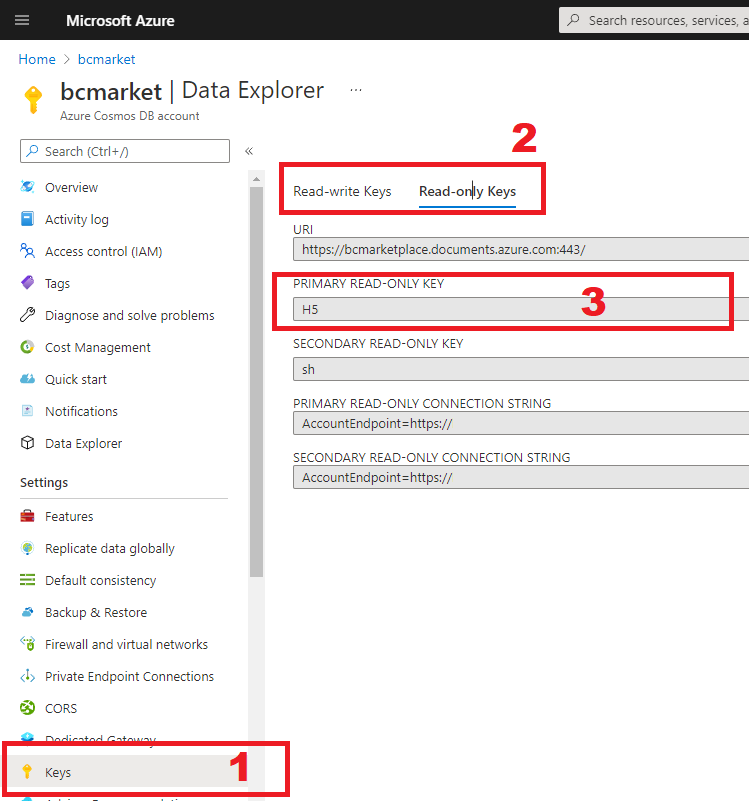
And that’s it! You have created Cosmos DB database with example data. Now you can connect to this database using APIs (we will look at how to do it in the next article). You just need to know your access key which you can find under “Keys” -> “Read-write Keys” or “Read-only Keys” based on your requirements.
