Everyone is surely aware of how strong Excel is as a software. It has been deeply ingrained in corporate operations worldwide, whether it be for assessing stocks or companies, creating budgets, or organizing customer sales lists.

Usage of Excel Layout
Due to the fact that it comes with its own unique set of functions, the layout is considered as a separate tool from the others. The following are some examples of how to use Excel’s layouts:
- Users can generate dynamic reports using graphics such as slicers.
- Users have the ability to access original data from the report database, which can assist in better comprehending how the study functions and the origin of the data displayed on graphics.
- Make use of built-in tools of Office to perform post-processing just on generated reports, such as:
- Safeguarding the spreadsheets (password & other standard Excel protection).
- Implementing labels for levels of sensitivity.
- Including additional remarks and notes.
- Prediction and investigation are included.
- Utilize already installed add-ins and app integrations, such as Power Automate flows.
How to Use Excel Layout
When it comes to the configuration of an Excel layout for a report, there are fundamentally two steps:
Step 1. Create a file for Excel Layout
There seem to be three approaches that the developers propose using in order to work with an Excel layout file, and each of these approaches will be broken down further in the following section of this article. Regardless of the type of layout currently being used, you can utilize the techniques shown here to generate an Excel layout of any document. The only things that will be included in the Excel layout are still the necessary Datasheet and column, as well as a page for the report’s information.
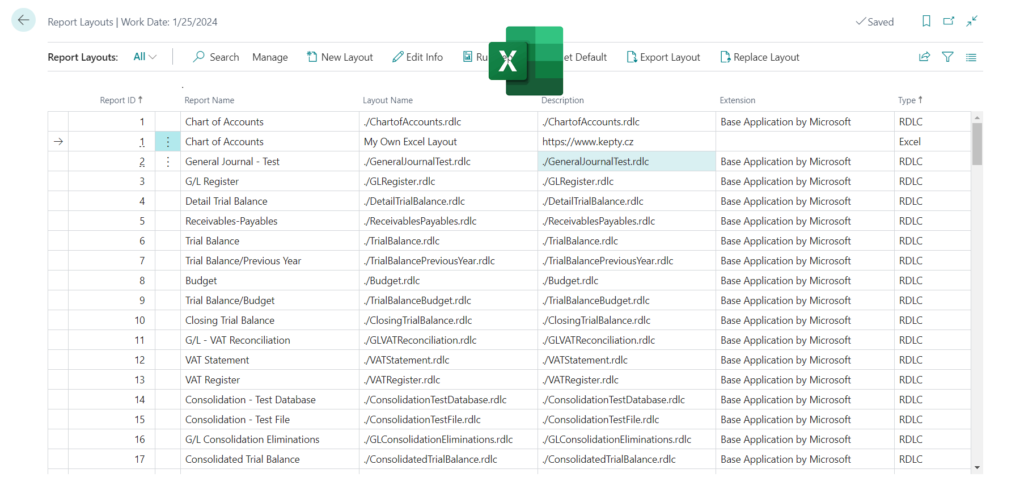
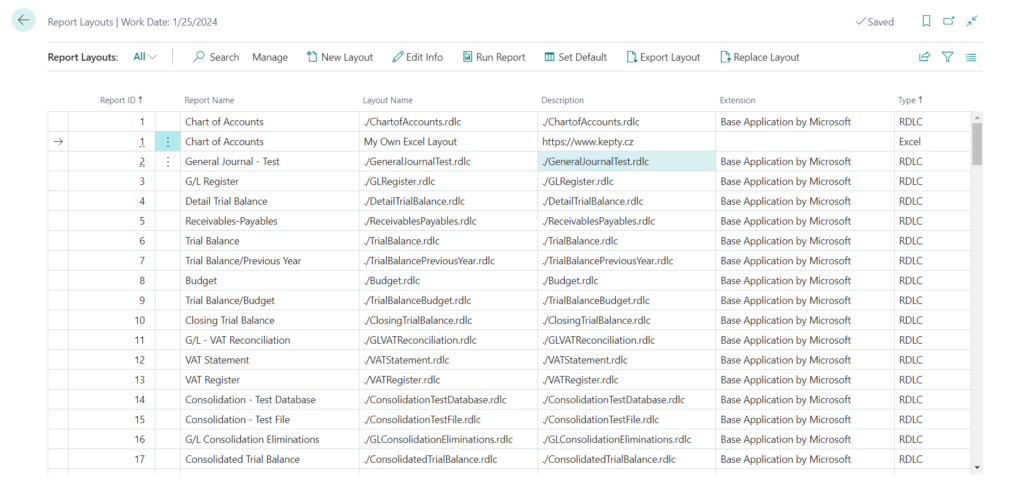
- Select the “Tell me” by, type in “Report Layouts“, and afterward select the relevant link.
- List of all existing reports loads up and displays a comprehensive list of all the formats that are presently accessible for use with any report.
- Choose the one report you want to create layout for from the available options, and then click the “Run Report” button.
- (other way): Just open the report request page using any other process you know that opens the right report.
- On the request page of the report, choose to “Send to…” — “Microsoft Excel Document (data only)” and then click “OK“.
- In this stage, an Excel workbook that holds the report data is downloaded to your computer.
- Excel must be used to make any necessary edits to the downloaded file (it’s strongly recommend to not use any other editors from Microsoft Office).
Step 2. Update Excel Layout in your Business Central
After you have updated the Excel layout document, the following step is to update the available Excel layout in your system.
- Select the “Tell me“, type in “Report Layouts“, and selecting the relevant link afterward.
- Choose the “New Layout“.
- Choose proper report in the “Report ID” field.
- Add new “Layout Name” & “Description“
- Select “Excel” in “Format Options“
- Choose “OK”
- Locate the Excel file you want to publish, then click the Open button. The layout receives the specified file, and after that, you are sent back to the page that lists the Report Layouts.
- Choose the new format from the menu, then choose “Run Report” to see how the report will be created.
How Excel Layout Works
When you just begin developing new Excel layouts or modifying existing ones, there are a few aspects you should be familiar with and think about. A “Data” sheet, as well as a “Report Metadata” sheet, are essential components that should always be included in any Excel arrangement. These pieces define data on Business Central, which you can interact with, and as a result, they serve as the foundation of the layout.
