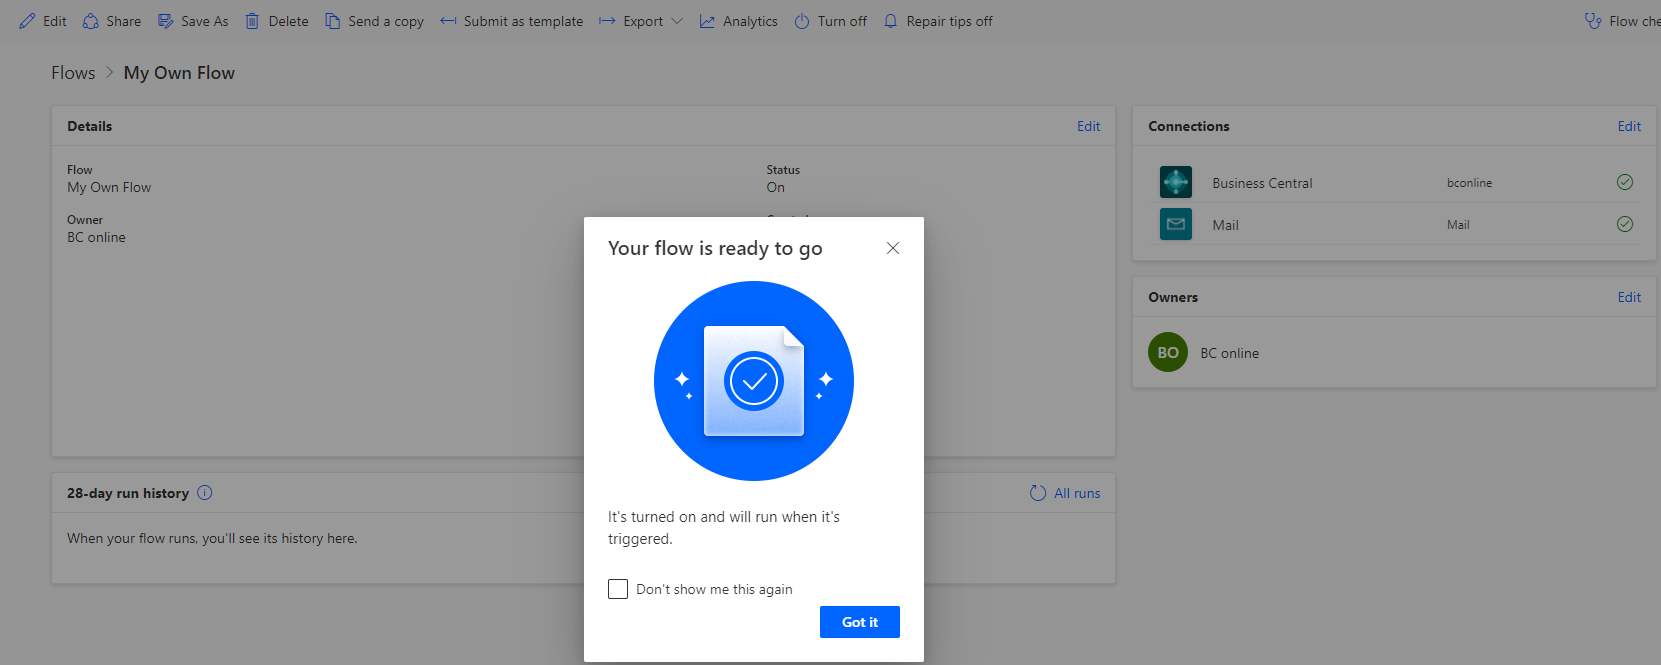
Microsoft Flow is a great tool for managing your integrations and for task automation. Microsoft Dynamics 365 Business Central have some prepared packages & functionality that allows creation flow with no code (if you want to code, you can).
In this article, we will look at how to create a basic flow that is invoked when a new record in Business Central is created (similarly, it can be easily adapted to Deleted/Modified records).
Create new Flow
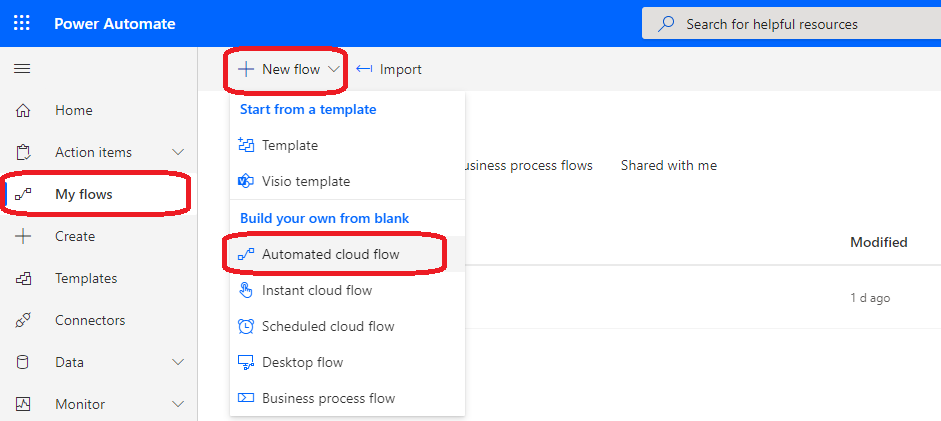
Let’s start with creating a basic flow.
- Select “My Flows”.
- Create a flow using the “New flow” option.
- Select “Automated Cloud Flow”
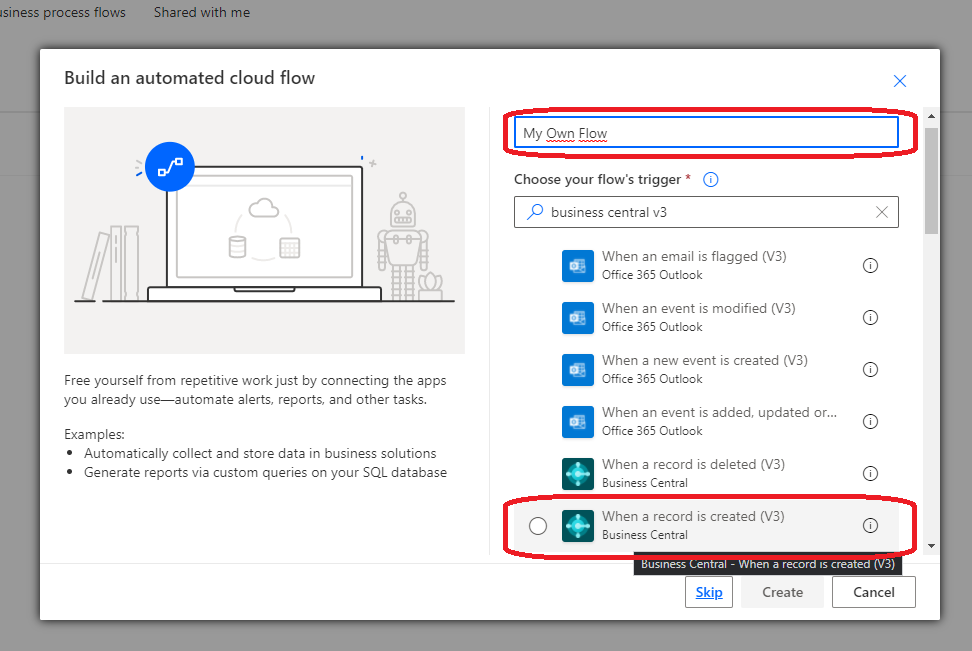
- Name your flow so you will be able to identify it later.
- Select “When a record is created (V3) trigger” and continue with the “Create” button.
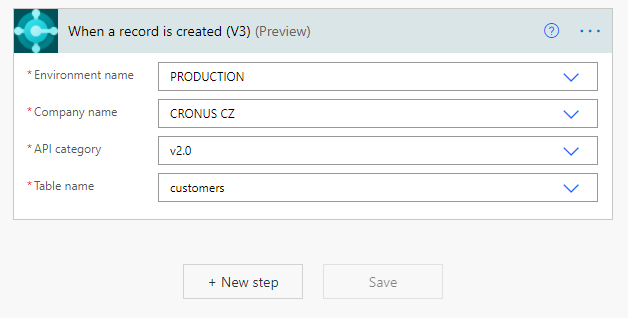
Now you should see Flow designer with the initial trigger entity “When a record is created (V3)”. All fields will be probably empty and have to be configured based on your requirements (see the picture below).
- Environment name
- Select your Business Central environment from the list of available environments (in my case I chose PRODUCTION).
- Company name
- Again, select your company (if you have more companies), in my case I chose the default CRONUS company.
- API category
- Here you can specify from which category/API route you want to load the APIs. If you want to use any of the default APIs (published by Microsoft), choose v2.0.
- If you have installed other extensions in your Business Central environment that contains APIs, select them from the list. For your own APIs, the route is APIPublisher/APIGroup/APIVersion (for example keptycz/flowexample/v1.0).
- Table name
- The name of this field is a bit misleading… The list contains all available API (pages & queries) so select API that should trigger the flow.
We have the first step completed. The Flow will be automatically started once a new record is created. However, the flow itself does nothing right now. We have to add two new elements – load values from the record that triggered our flow and send a notification with record details to the custom email (we have many other options like saving values to Microsoft Dataverse, call other APIs… but for this example, the email notification is sufficient).
Look at the screenshots below and create both elements (“Get record (V3)” and “Send an email notification (V3)”) and configure them similarly to the first entity.
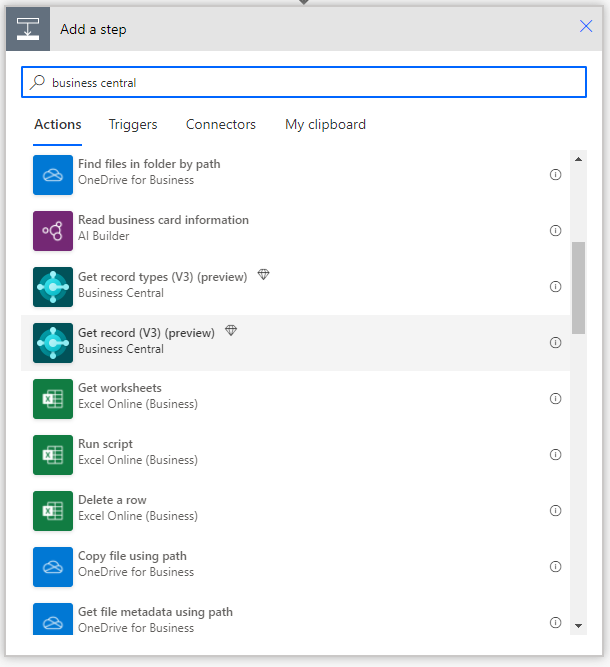
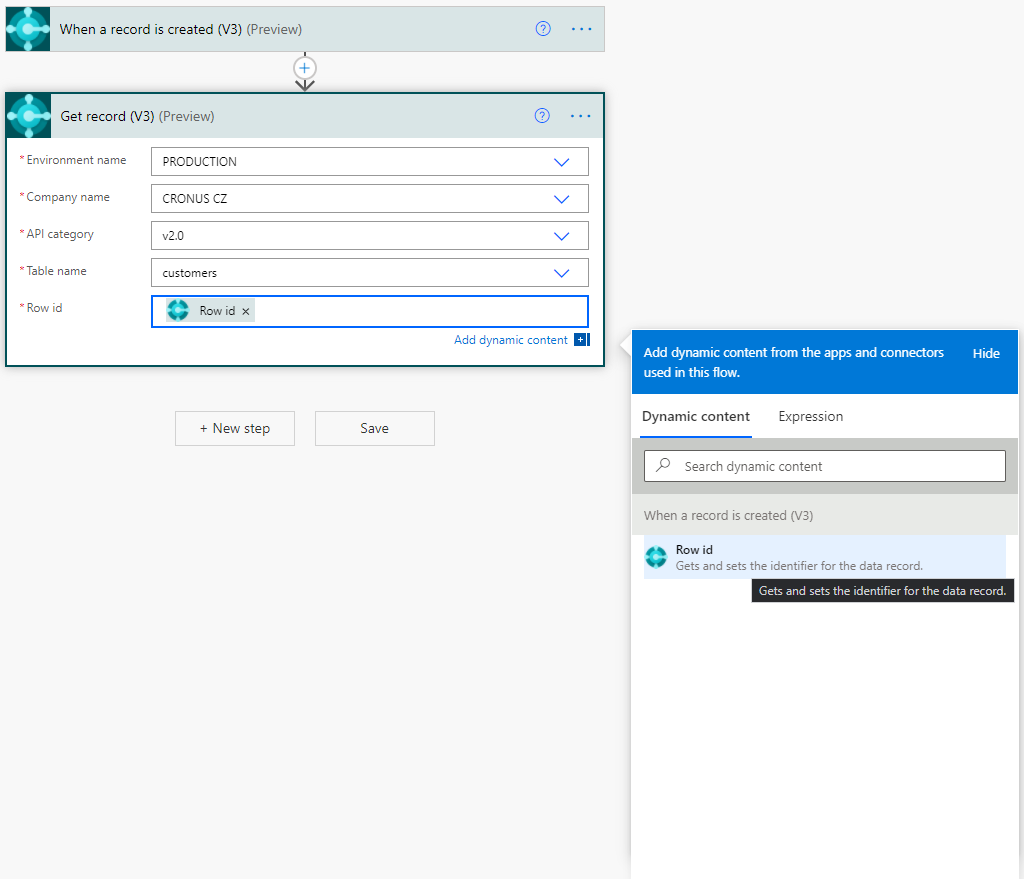
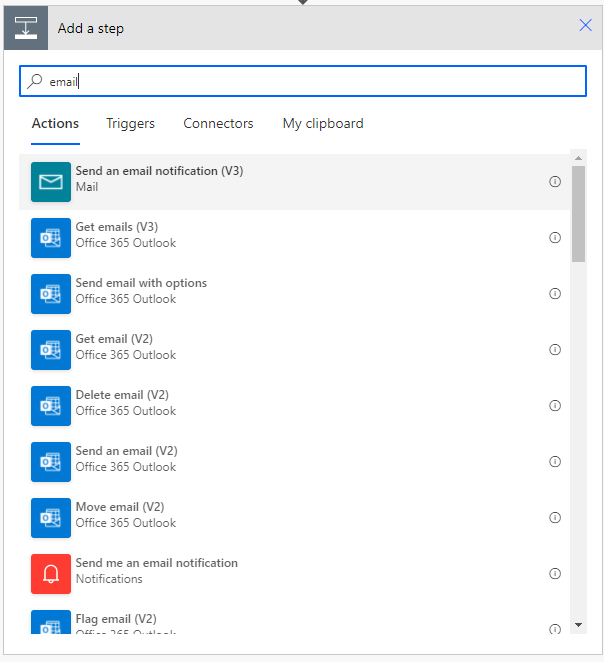
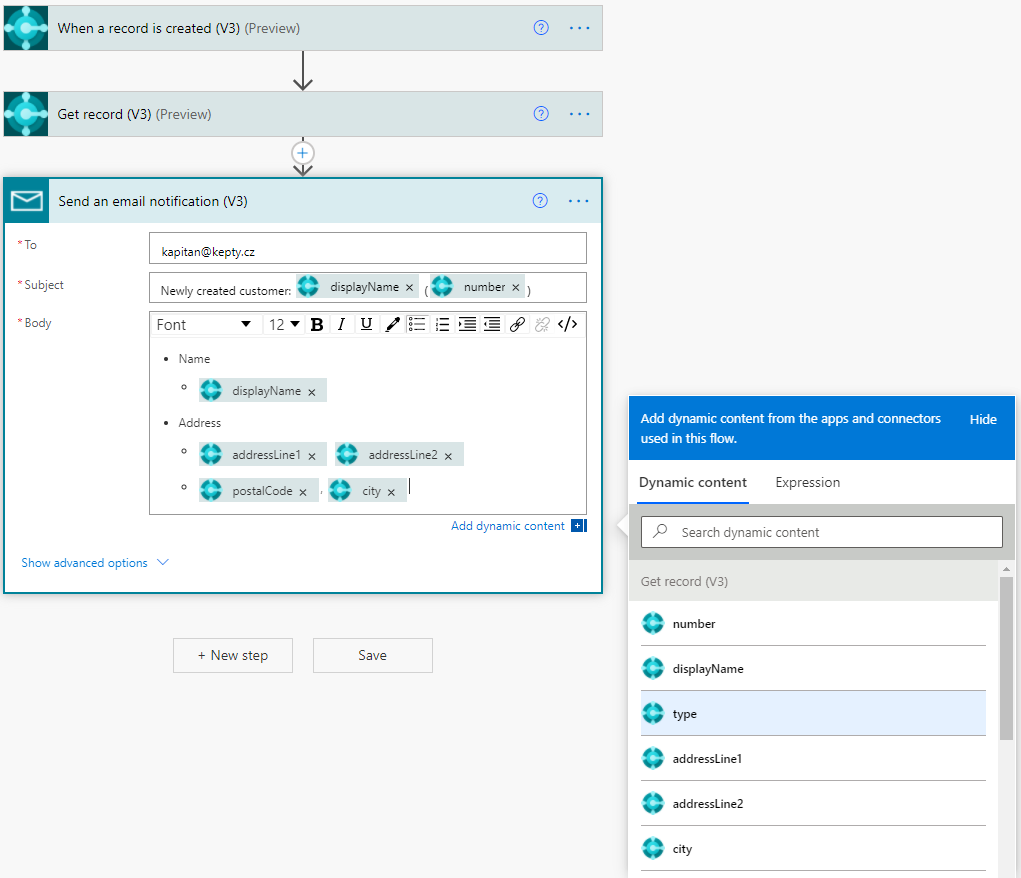
Save the Flow and that’s it! You can try the Flow by creating a new record in your Business Central company in the table you configured in the previous steps.
Really easy, isn’t it? 😉
